Manage Your Menu Visibility Based on User Roles
Do you want complete control over which users can see specific menu items? With the Role Based Menu Visibility plugin, you can easily determine which user roles have access to which menu options. This provides maximum flexibility, ensuring only relevant content is visible to the right users.
Features:
✔ Control visibility per user role – Select one or multiple roles for full access management.
✔ Maximum flexibility – Combine multiple roles for specific menu items.
✔ Supports all user roles – Both default and custom user roles are automatically displayed.
✔ Easy to use – Select roles through a simple dropdown, no manual entry required.
✔ Seamless integration – Works effortlessly with WordPress and other user management plugins.
This plugin gives you complete control over who can see what content, without complicated settings. Perfect for membership sites, online courses, or exclusive content!
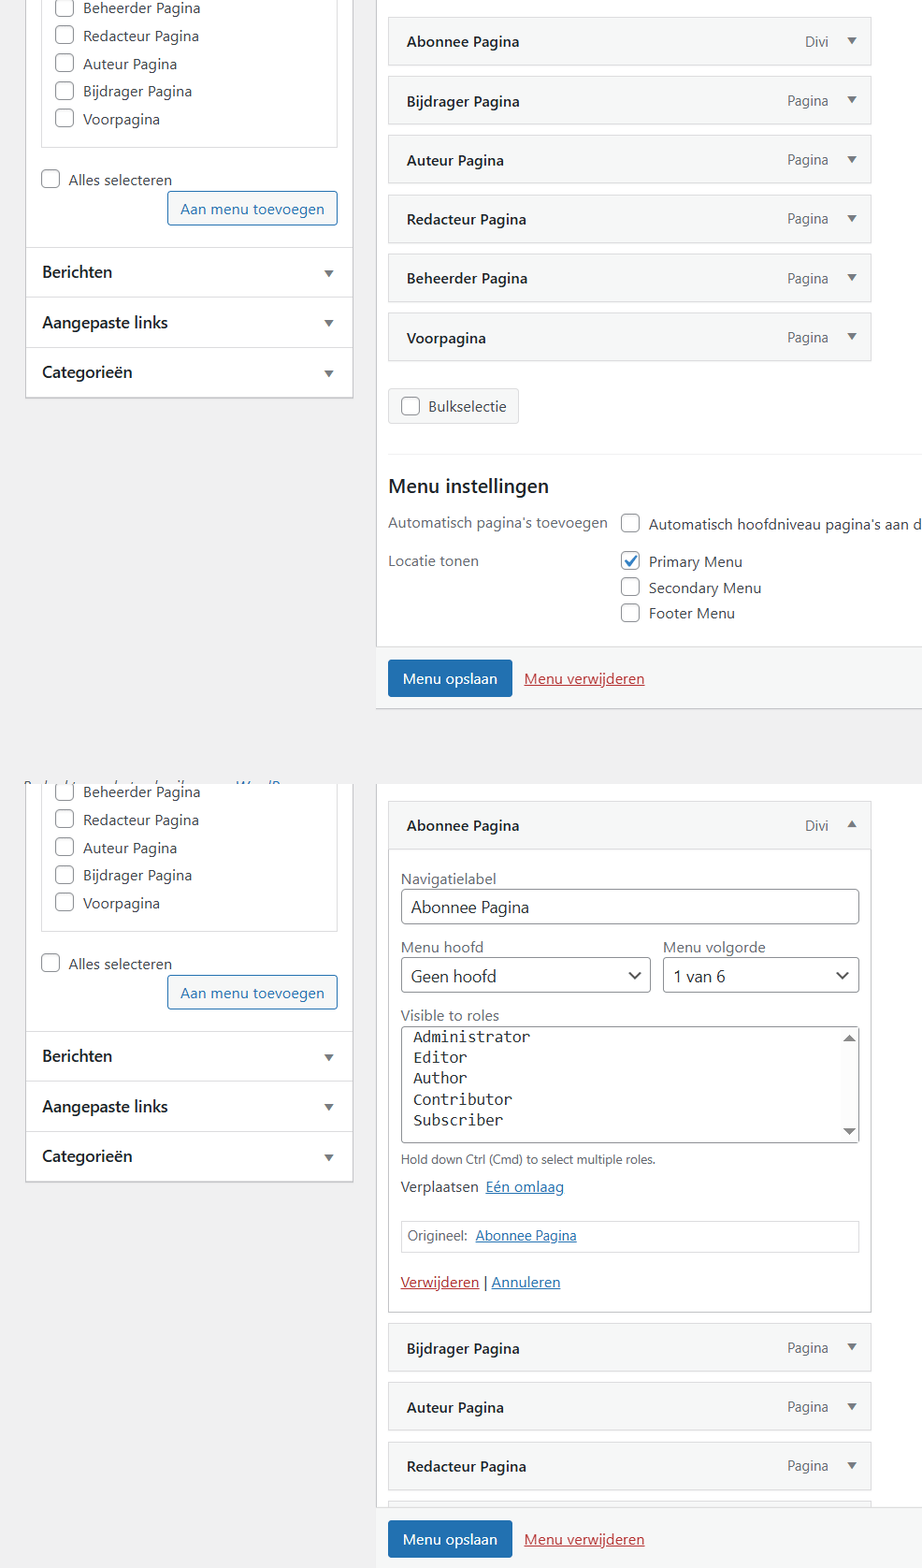
Accessible to all visitors
If no roles are saved for a menu item, it’s treated as unrestricted—so the item is visible to everyone, including non-logged-in users.
Deselect a role or all roles.
To revert a menu item back to “Everyone” (i.e. no restrictions), you simply clear out the role selection in the menu item’s custom field.
Just click on the blue role name. Or when there are more than one roles, press CRTL and click all roles that are currently selected (so with blue background) to be removed.
When you remove all roles and then save the menu, the meta field is deleted. That means no role restrictions are applied, so the item will be visible to all visitors.
UPDATE
Now, newly added to this plugin is the possibility to blur content for not logged in users. Brilliant teaser that shows that there is more to be seen. But you have to be a member, customer, or buy a subscription.
Check this nifty feature on the demo site (button below)
Like it? Want to use it?
Drop me a mail with the contact form
How to install a plugin
Paid WordPress plugins are not listed in the WordPress plugin directory. To install thoe plugins, WordPress comes with the upload method in the admin area.
First, you’ll need to download the plugin from and put it on your local harddisk.
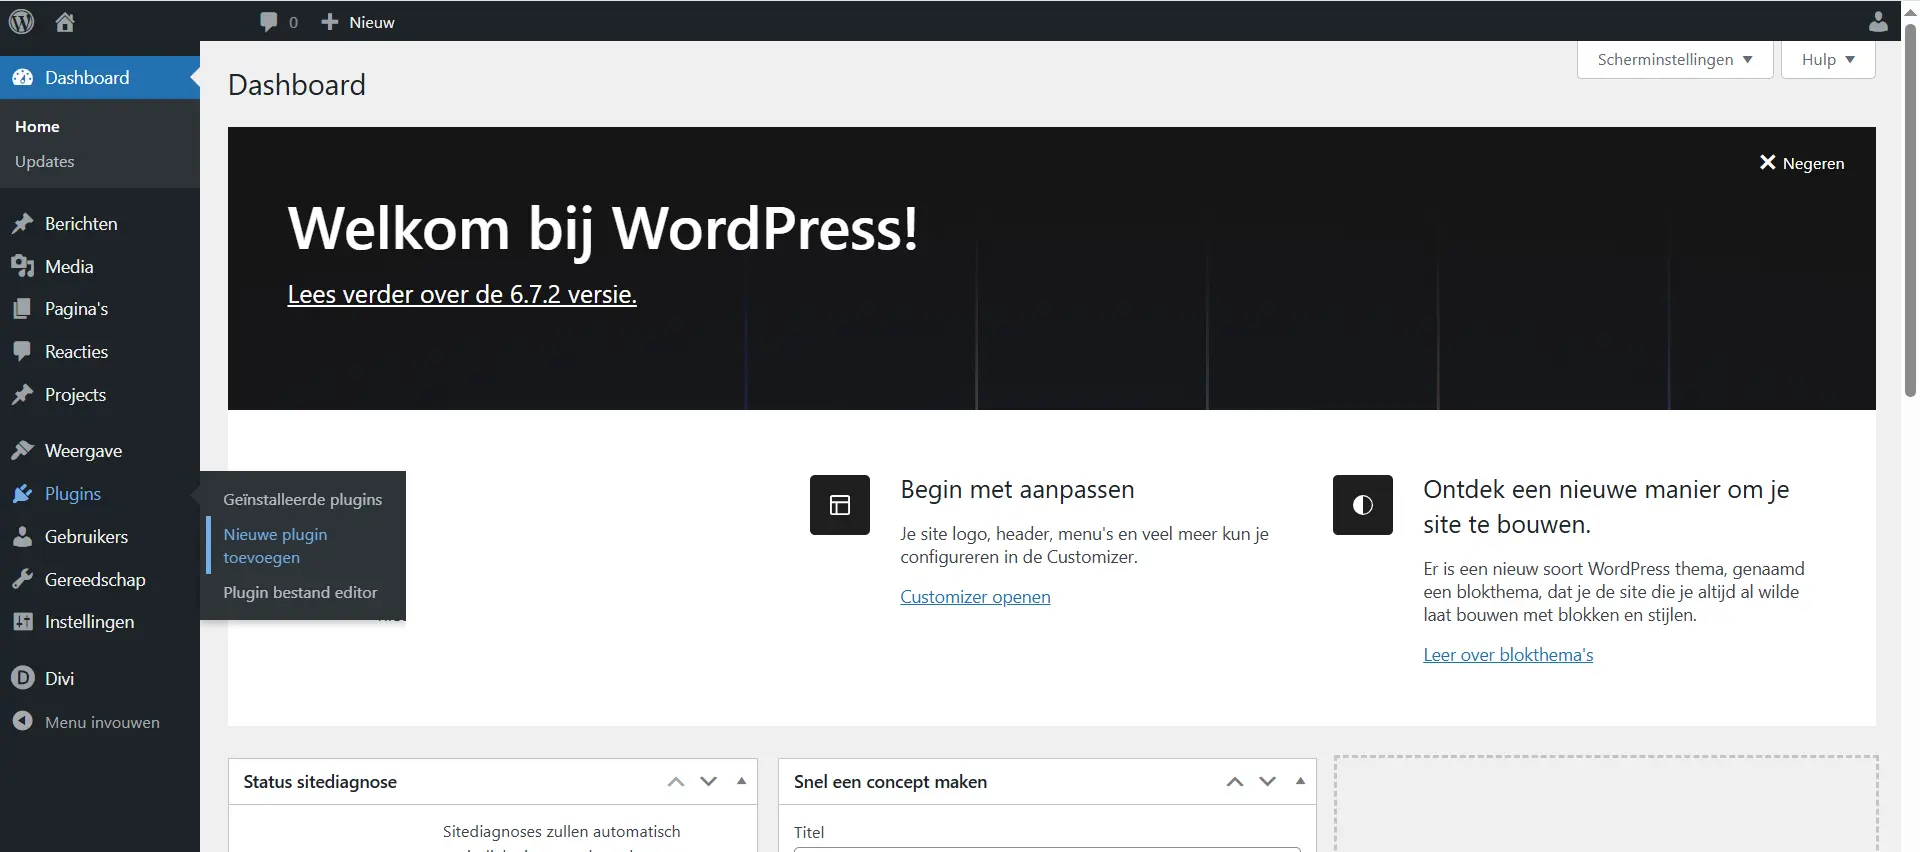
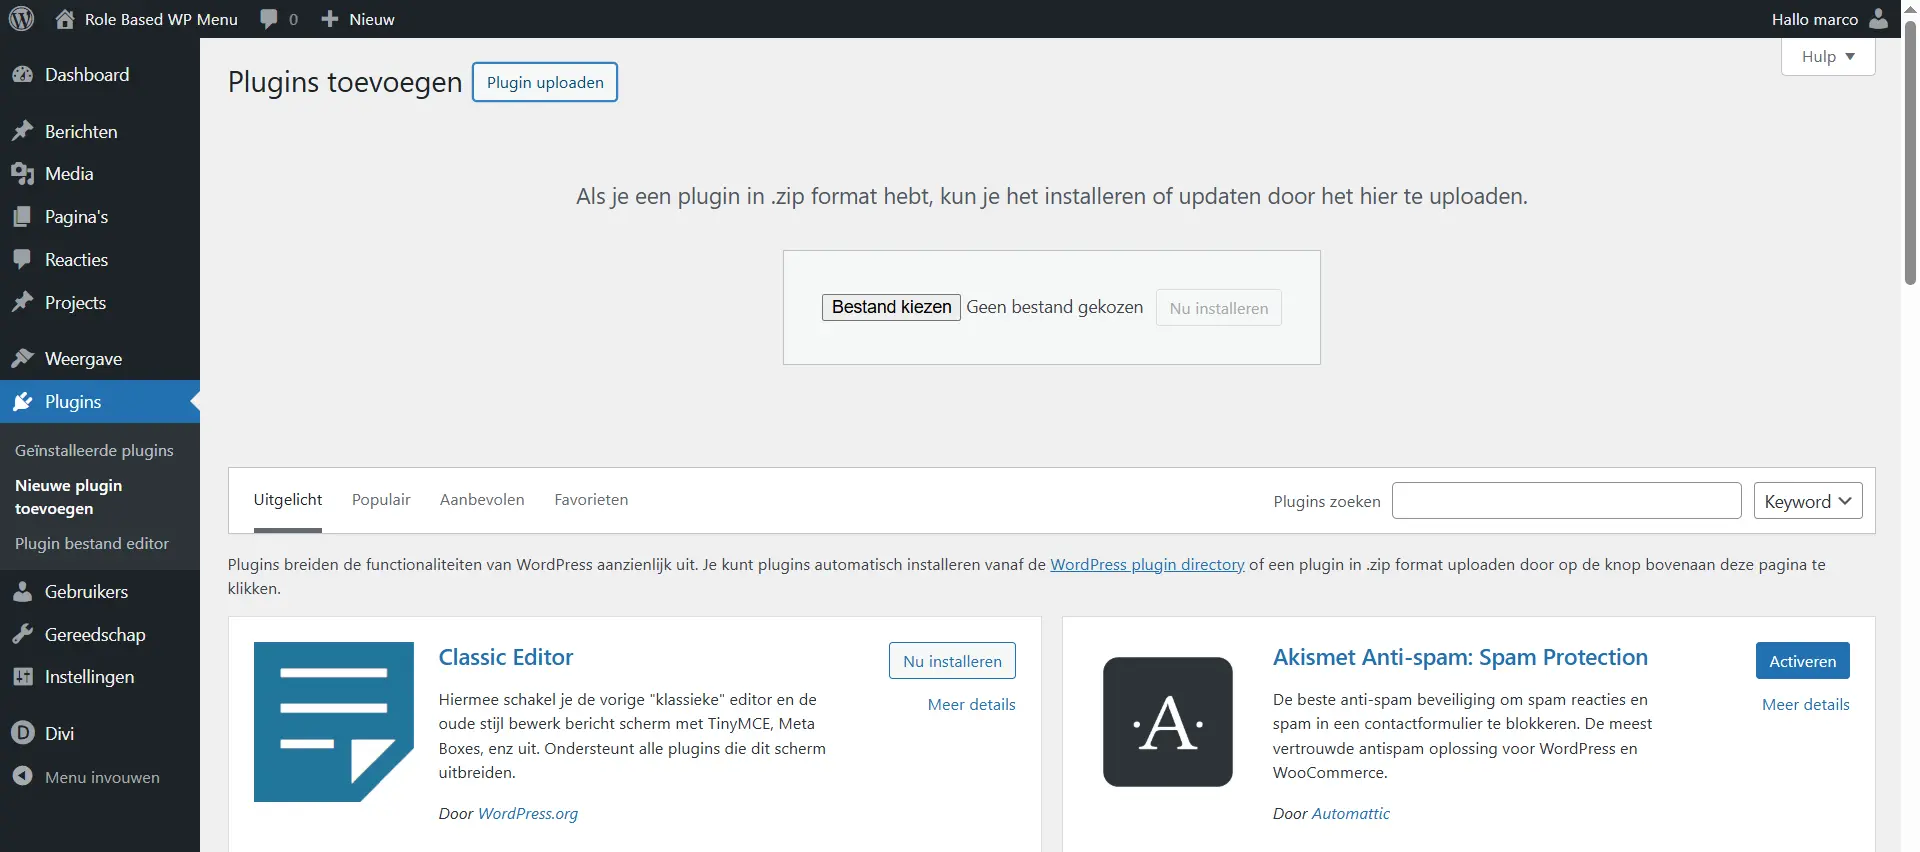
Now, you navigate to Plugins » Add New from the WordPress admin area.
(NL: Plugins > Nieuwe Plugin toevoegen)
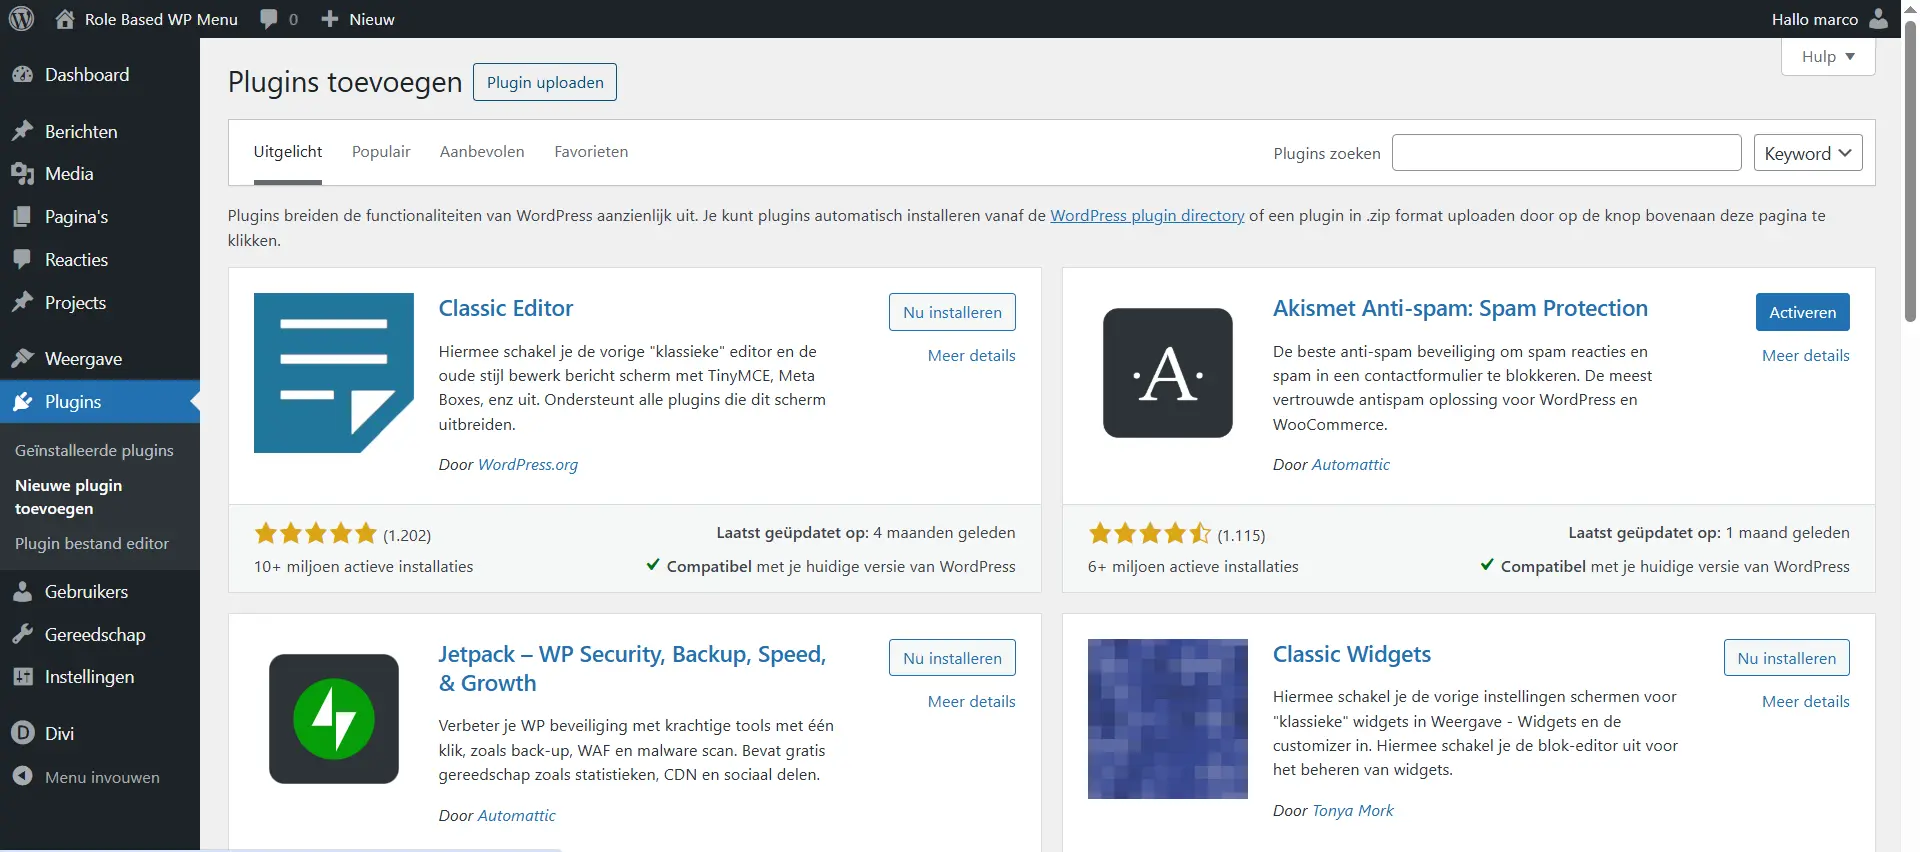
After that, just click on the ‘Upload Plugin’ button at the top of the page.
(NL: Plugin uploaden)
Click the ‘Choose File’ button and select the plugin file you downloaded earlier to your computer.
Select the file, and click the ‘Install Now’ button.
(NL: Bestand kiezen en Nu installeren)
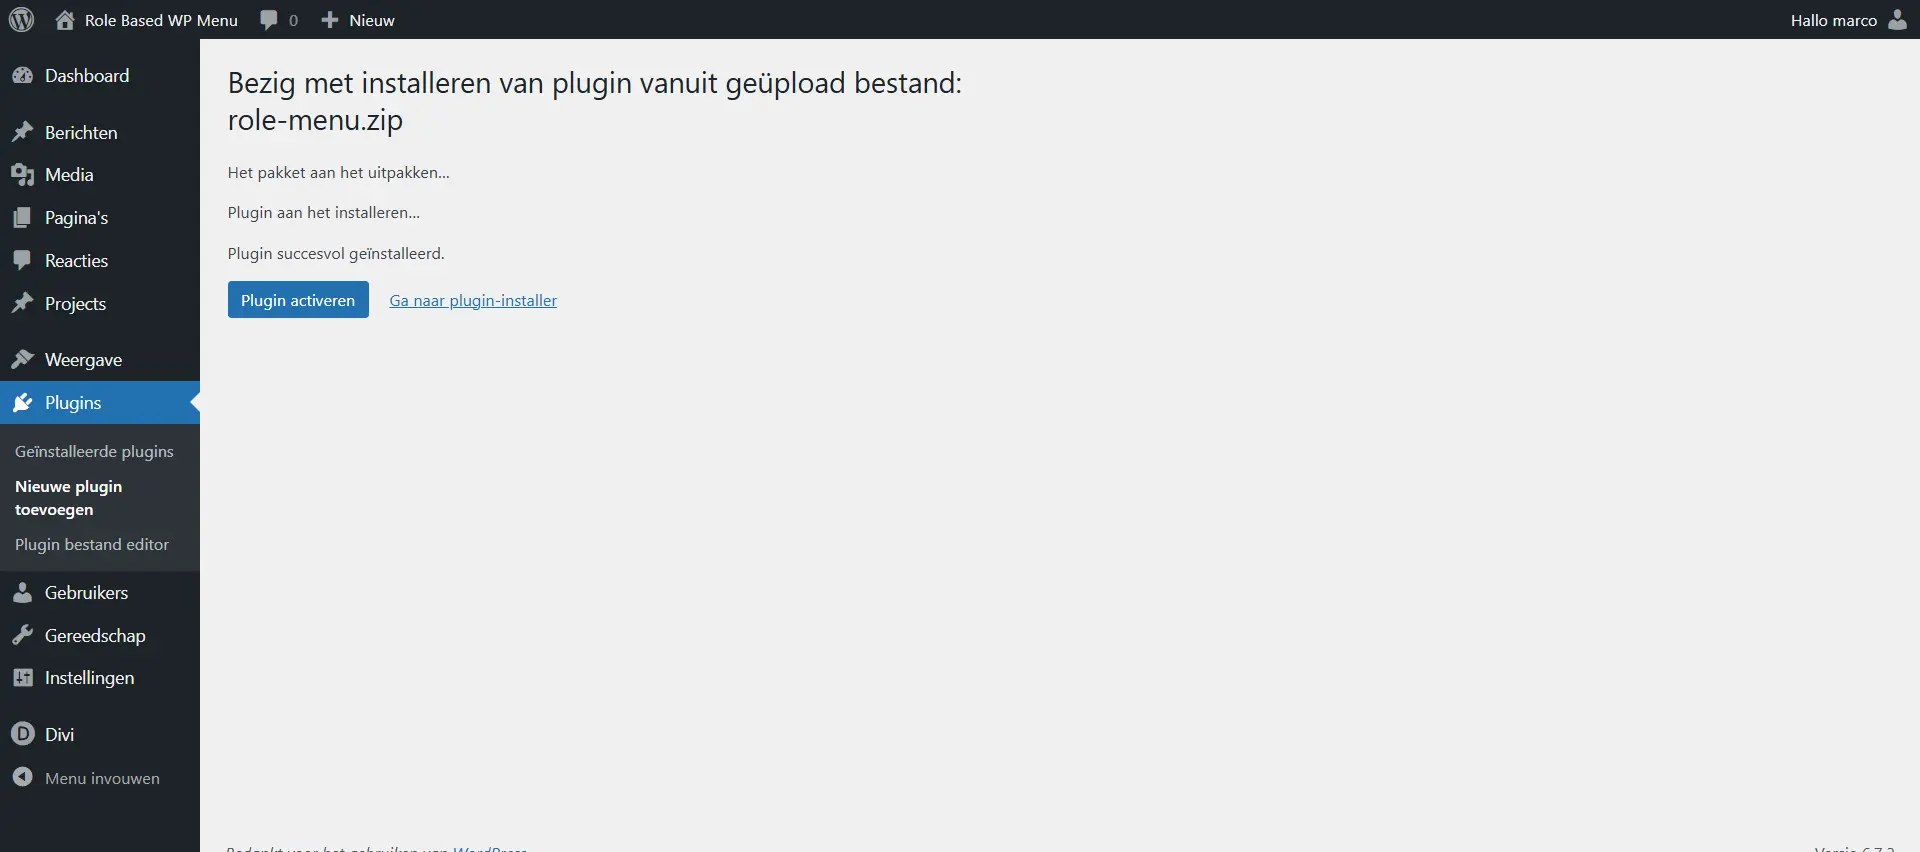
WordPress will now upload the plugin file from your computer and install it for you. After the installation is finished, you will see this message below.
Finish te process by clicking the ‘Activate Plugin’ button. Now the plugin is uploaded to your site and you can start using it.
(NL: Nu activeren)
